DIY Woodworking: Mastering Dado Joints for Perfect Fits
Hey there, woodworking enthusiasts! Let's talk about dado joints. Now, I know what you're thinking: "D-a-d-o? What's that even mean?" Well, a dado joint is basically a groove that you cut into a piece of wood, and it's a super handy way to join two pieces together, especially when you need a super strong and stable connection. Think of it as a slot that's perfect for fitting another piece of wood.
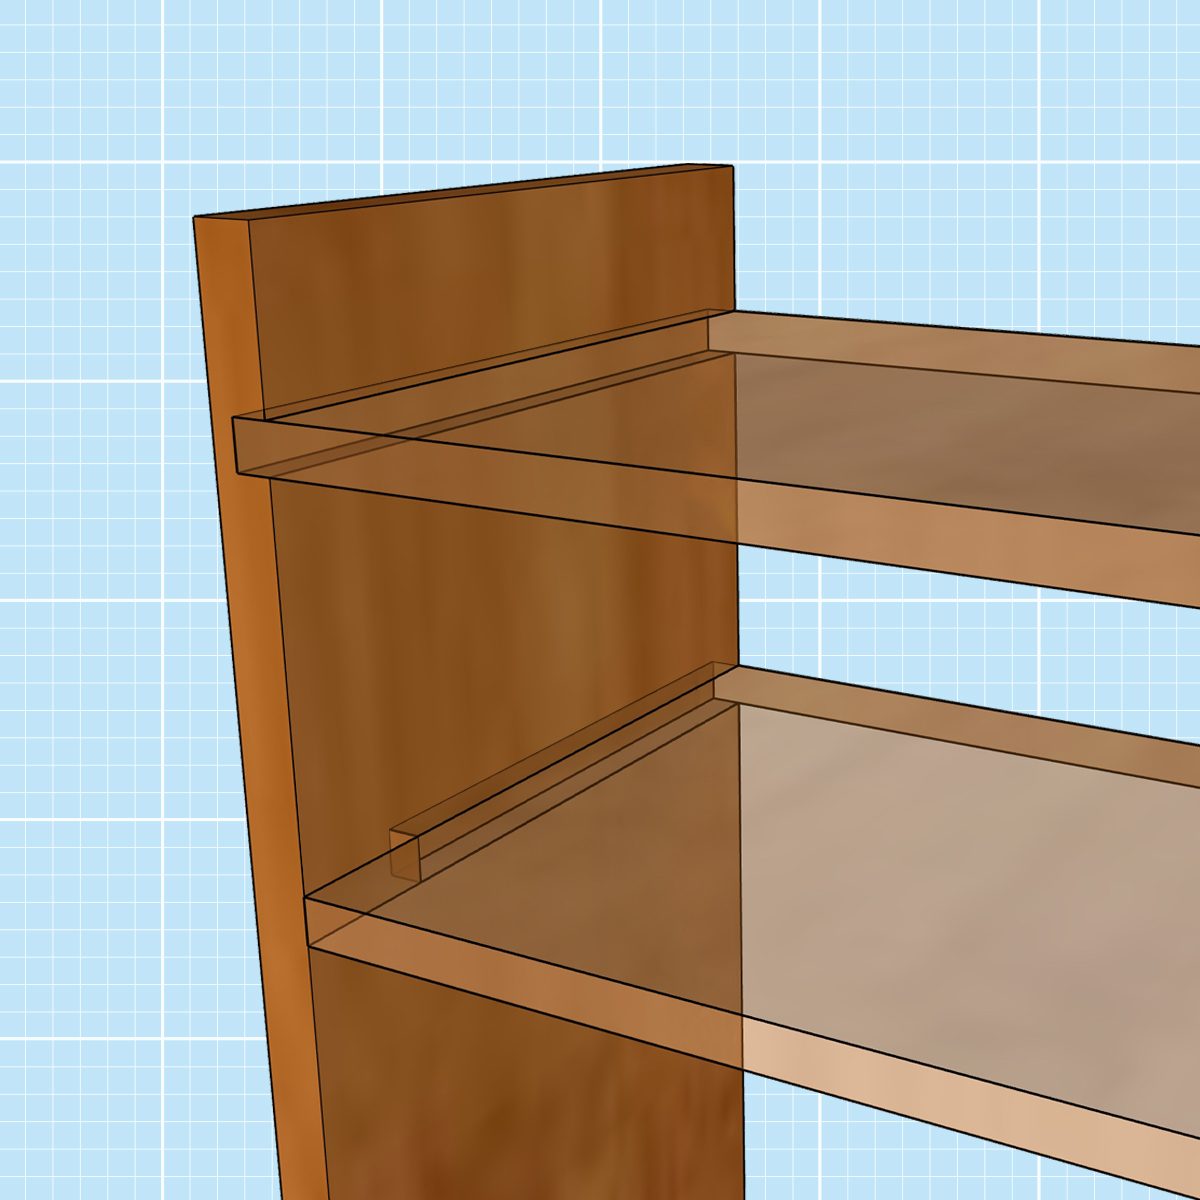
Unlike a rabbet joint, which is a groove that runs along the edge of a board, a dado joint runs across the width of the board. This makes it perfect for creating shelves, drawers, and all sorts of other furniture where you need a strong and sturdy connection.
Now, I'll be honest: making dado joints can seem intimidating at first. But trust me, once you get the hang of it, you'll be creating beautiful, precise joints in no time. So let's break down how to master dado joints, step by step.
Setting Up Your Tools
You'll need a few tools to make dado joints, but nothing too fancy. The most important tool is a table saw. A good table saw is your best friend for making clean, accurate cuts.
Here's what you'll need:
- Table Saw
- Dado Stack
- Push Sticks
- Measuring Tape
- Pencil
- Safety Glasses
- Ear Protection
Now, let's talk about the dado stack. A dado stack is a special set of saw blades that you use with your table saw to create the dado groove. The stack is made up of a thin, outside blade and a series of inside blades called chippers. The chippers are what create the groove, and they can be adjusted to control the width and depth of the dado. You can buy a complete dado stack, or you can buy individual chippers to create a custom stack.
Don't forget your push sticks! These are crucial for keeping your fingers safe when making cuts on the table saw. Push sticks help you move the wood through the blade without getting too close.
Getting Started
Alright, let's start making dado joints! The first step is to set up your table saw. Make sure your table saw is properly aligned and that the blade is sharp. You don't want to mess around with a dull blade! Next, you need to assemble your dado stack. Follow the instructions that came with your dado stack, and remember to double-check that all of the blades are securely fastened. It's a good idea to practice making a few test cuts on some scrap wood to make sure you're comfortable with your setup before cutting your real project pieces.
Making the Dado
Now, you're ready to make your dado joint. You'll need to measure and mark the location of the dado on the piece of wood. Use your pencil to mark the width of the dado, and be sure to mark the exact depth. Remember, the depth of the dado should be equal to the thickness of the piece of wood you're going to join it with. You'll also want to make sure that your dado is perfectly aligned with the grain of the wood. When you're ready, carefully raise your table saw blade to the desired height, which is the depth you measured for your dado. Then, carefully feed the wood through the saw, using your push sticks to guide it and keep your fingers safe. Remember to go slowly and steadily, and you'll get a nice, clean cut.
Tips for Perfect Cuts
Here are a few extra tips to make sure your dado joints are perfectly fit:
- Use a fence: If you're cutting a lot of dado joints, a table saw fence can help to keep your cuts consistent and straight. A table saw fence is simply a guide that you can attach to your table saw. It's like a ruler, and it helps to ensure that all of your cuts are the same width.
- Practice on scrap wood: It's always a good idea to practice cutting dado joints on some scrap wood before you start on your real project. This will help you get comfortable with your tools and ensure that you're making clean, accurate cuts.
- Be patient: Cutting dado joints takes time and patience. Don't rush through the process, and take your time to make sure each cut is perfect. You'll get a much better result if you're patient and careful.
- Check your measurements: Before you make each cut, double-check your measurements to make sure they're correct. A small mistake in your measurements can create a big problem in your finished product.
Using Your Dado Joint
Okay, you've made your dado! Now what? A dado joint is a great way to make strong and secure joints in your woodworking projects. For example, you can use it to build shelving, drawers, and even frames. You can create dado joints that are perfectly fitted to create the strength and support that your projects need. Plus, they're incredibly decorative! Just make sure the wood you use to create your dado is the same thickness as the piece of wood you'll be inserting into it. This is key for a perfect fit!
Safety First
Remember, safety comes first when working with any power tools. Always wear safety glasses and ear protection when using your table saw. Never let anyone stand in the line of fire when you're cutting. Be sure to keep your hands away from the blade, and use push sticks to help you guide the wood through the saw. And most importantly, be sure to read and understand the manual for your table saw before you begin using it. This will help you use the tool safely and effectively.
Mastering dado joints is a rewarding journey. You can turn simple pieces of wood into beautiful and functional furniture. Just remember to take your time, follow the steps, and always prioritize safety. With some practice and patience, you'll be able to create strong, reliable joints that will last for years to come.


No comments:
Post a Comment
Note: Only a member of this blog may post a comment.